

This
tutorial assumes you have
working
knowledge of PSP.
I
am using PSP 9 but I'm sure all versions
would
work the same.
This
tutorial is owned by me,
from
my own creativity and ideas.
Do
not steal and copy as your own.
Any
similarity to any other tutorial is simply coincidence
and
not done purposely.
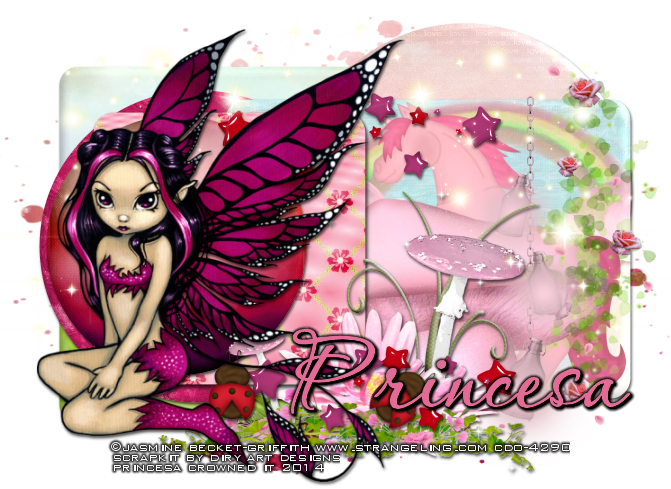
Supplies
Scrap
kit “January” by Bookworm Dezines
HERE
Tube by Zebrush at PFD
Tube by Zebrush at PFD
You
must have a license to use their art
Mask
#144 by Designs By Vaybs
HERE
Font I used was Basic Class A 156
HERE
Font I used was Basic Class A 156
Drop
shadow
2V
1H 70op 4B
Lets
begin
make
a 650x650 transparent canvas
copy
and paste element 27
resize
75%
use
magic wand and click inside frame
modify,
expand by 4
add
new raster layer
copy
and paste paper 1 into selection
select
none
move
paper layer behind frame layer
drop
shadow frame
copy
and paste element 25
resize
95%
drop
shadow
copy
and paste element 20
resize
50%
duplicate,
mirror, merge down
duplicate,
flip, merge down
move
to bottom of tag
copy
and paste element 24
see
tag for placement of this and all following elements
duplicate,
mirror, merge down
duplicate,
rotate right 90 degrees
merge
down, move to just above previous layer
copy
and paste element 22
resize
75%
duplicate,
mirror, flip
drop
shadow
copy
and paste element 19
resize
75%
flip
copy
and paste element 35
take
your eraser tool and erase the stem of the element
resize
50%
duplicate,
flip, duplicate, mirror, duplicate, flip
drop
shadow
copy
and paste element 7
duplicate,
mirror
drop
shadow
copy
and paste element 37
resize
25%
duplicate,
mirror
copy
and paste element
resize
30%
drop
shadow
copy
and paste element 23
resize
25%
duplicate,
mirror
drop
shadow
copy
and paste element 26
resize
30%
drop
shadow
copy
and paste element 8
resize
15%
duplicate,
mirror
drop
shadow
copy
and paste element 38
resize
75%
drop
shadow
copy
and paste tube
resize
and arrange to your liking
drop
shadow
copy
and paste paper 7
move
to bottom
load
mask, source luminance, fit to layer
merge
group
add
artists copyrights, add your name
merge
visible, save as a png
you
are done
Thank
you for trying my tutorial
.png)


